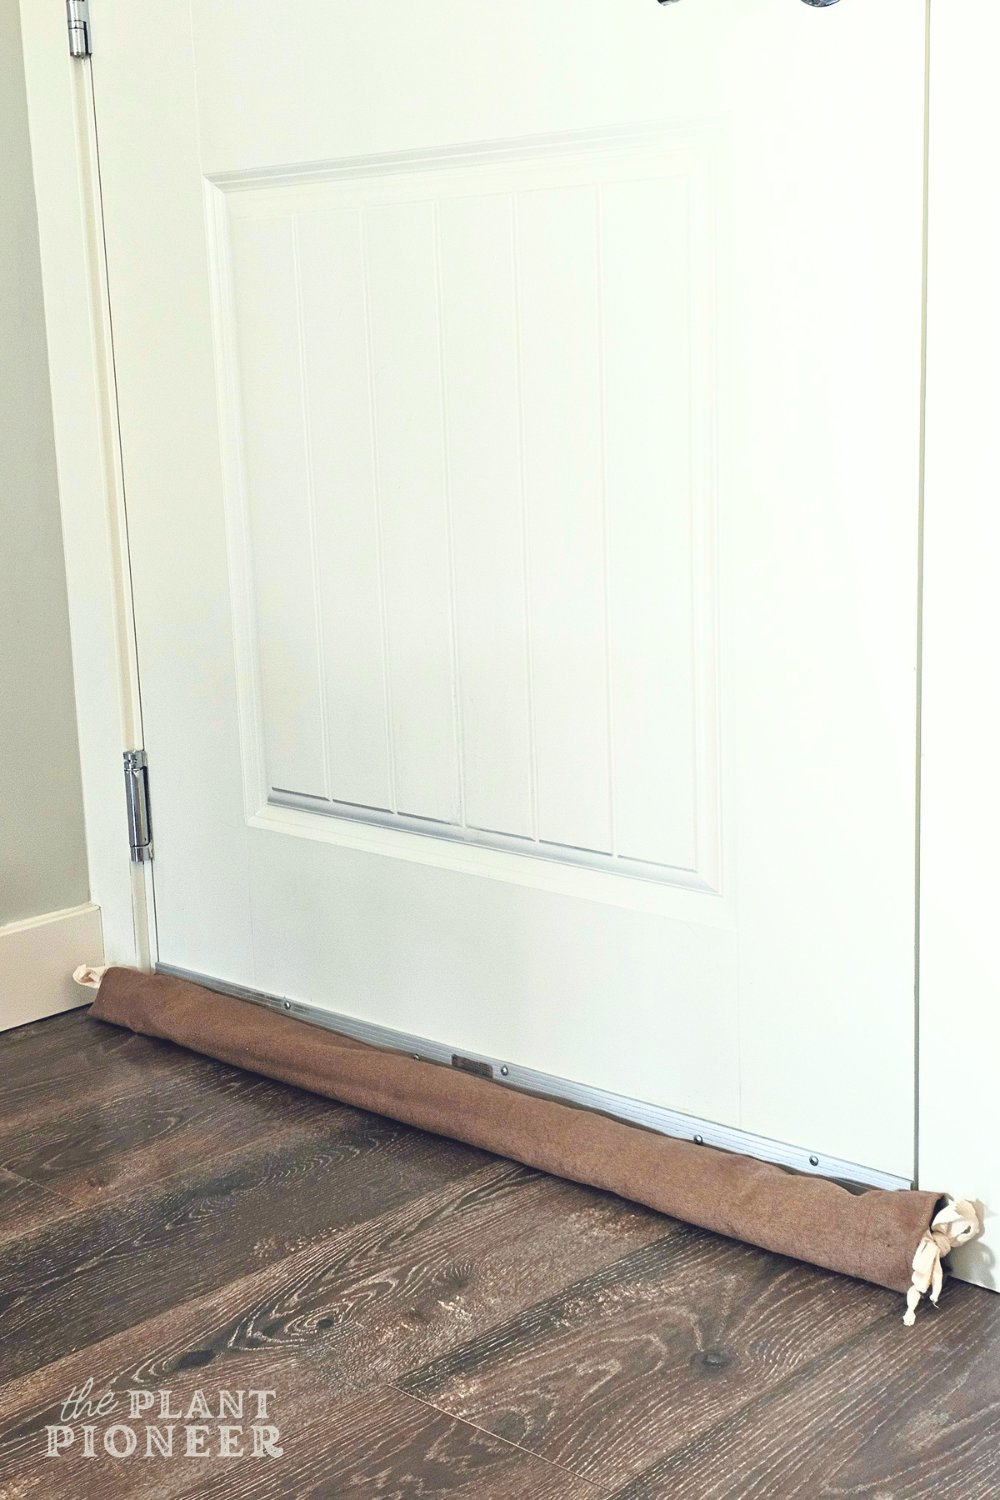
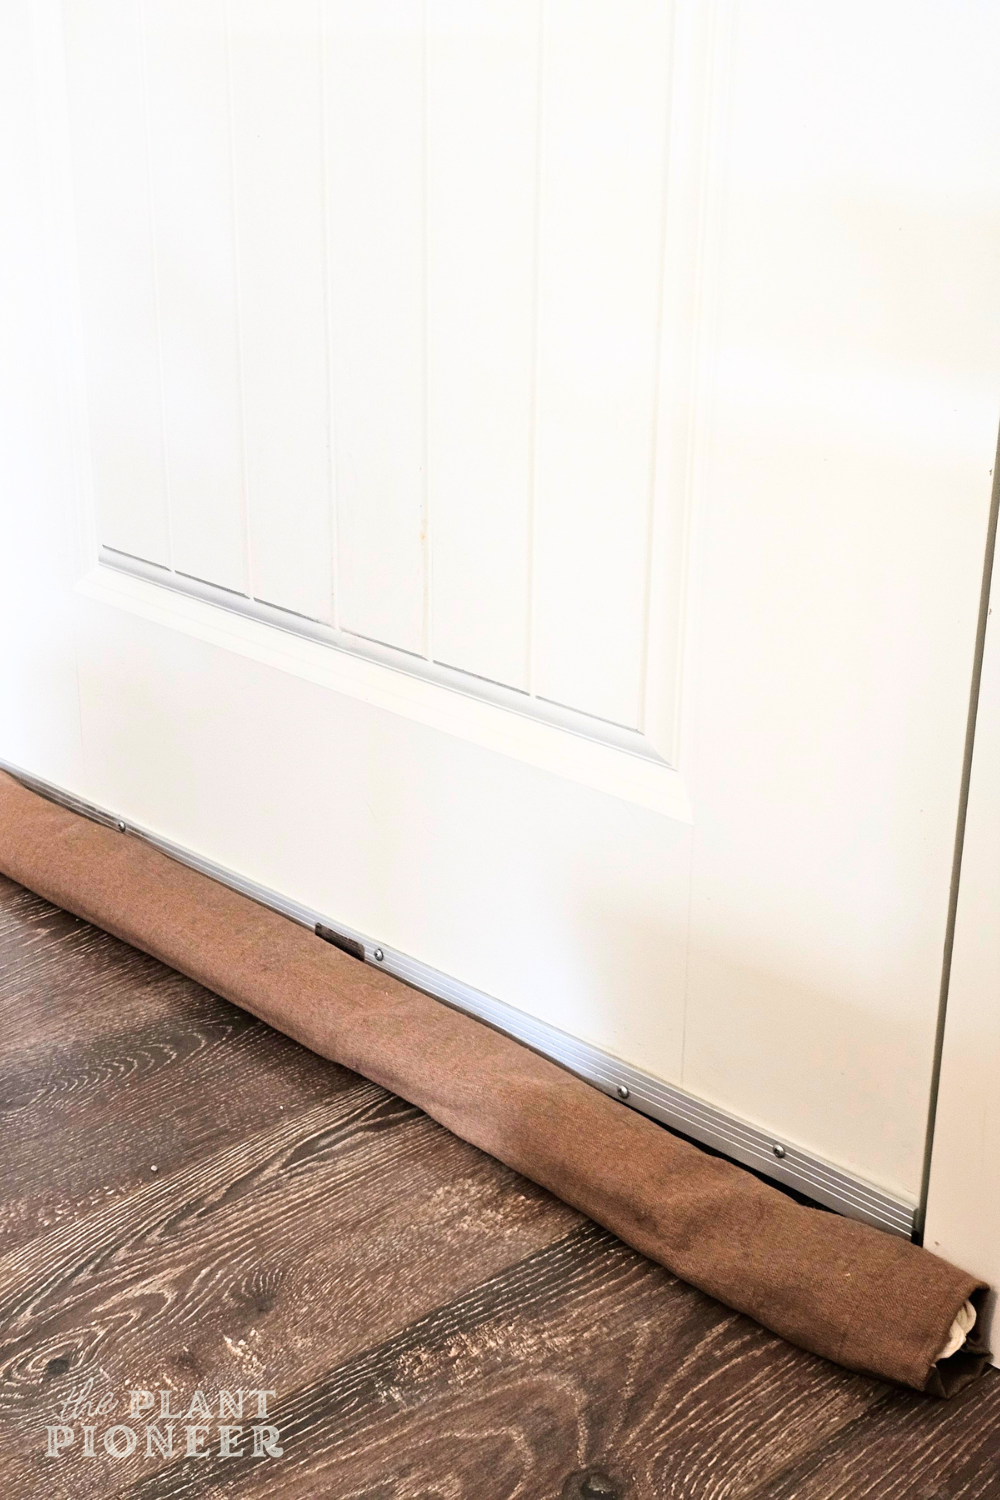
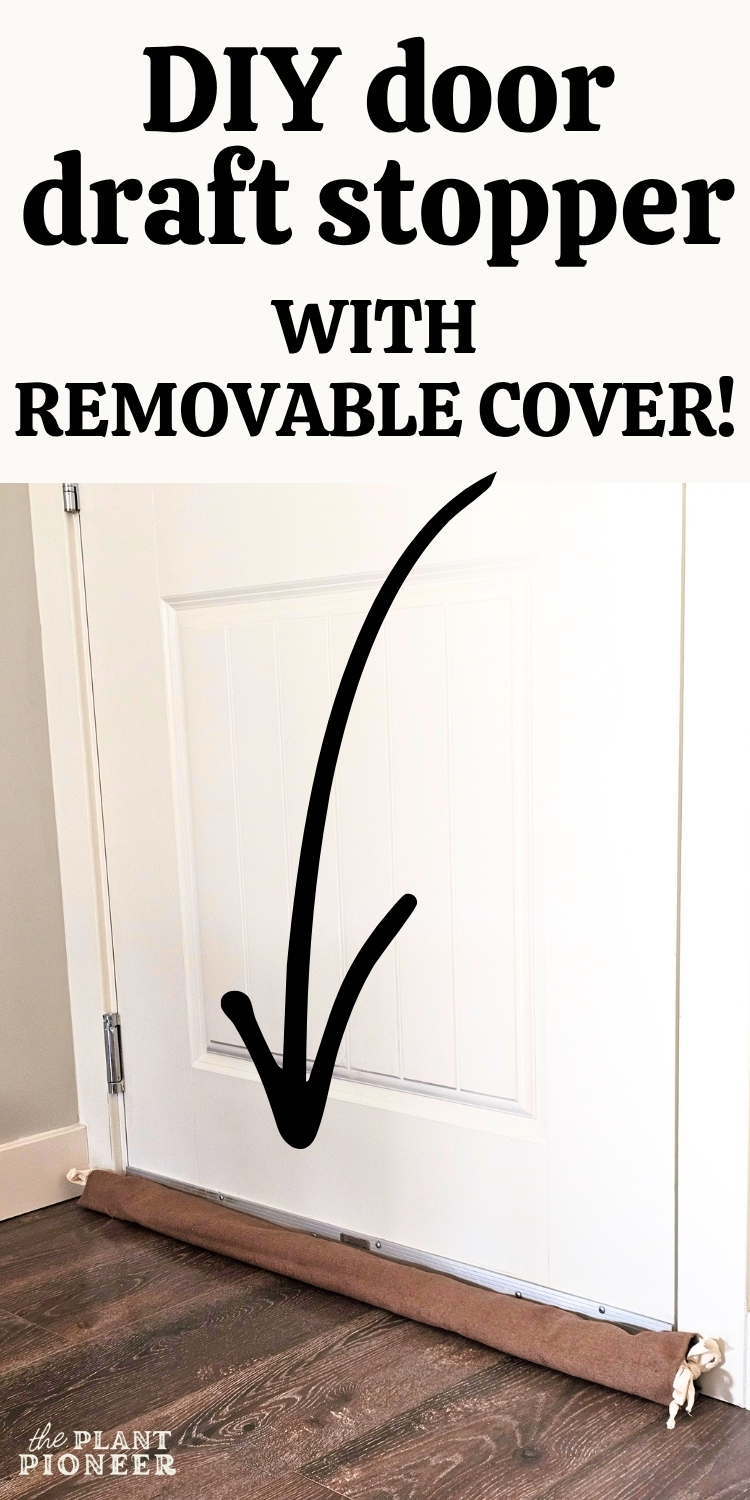
Easy Door Draft Stopper with Removable Cover (Perfect for Apartment!)
In today’s post, I’m showing you how I made this super easy door draft stopper using pebbles, scrap fabric, and an old pair of tights! Not only is this project budget-friendly and great for beginners, but it also has a removable cover that you can wash! This is something I highly recommend making if you’ve ever had a problem with odors or drafts coming in from under your front door, which is especially helpful if you live in an apartment. Read on to learn how to make this DIY door draft stopper with a removable cover.
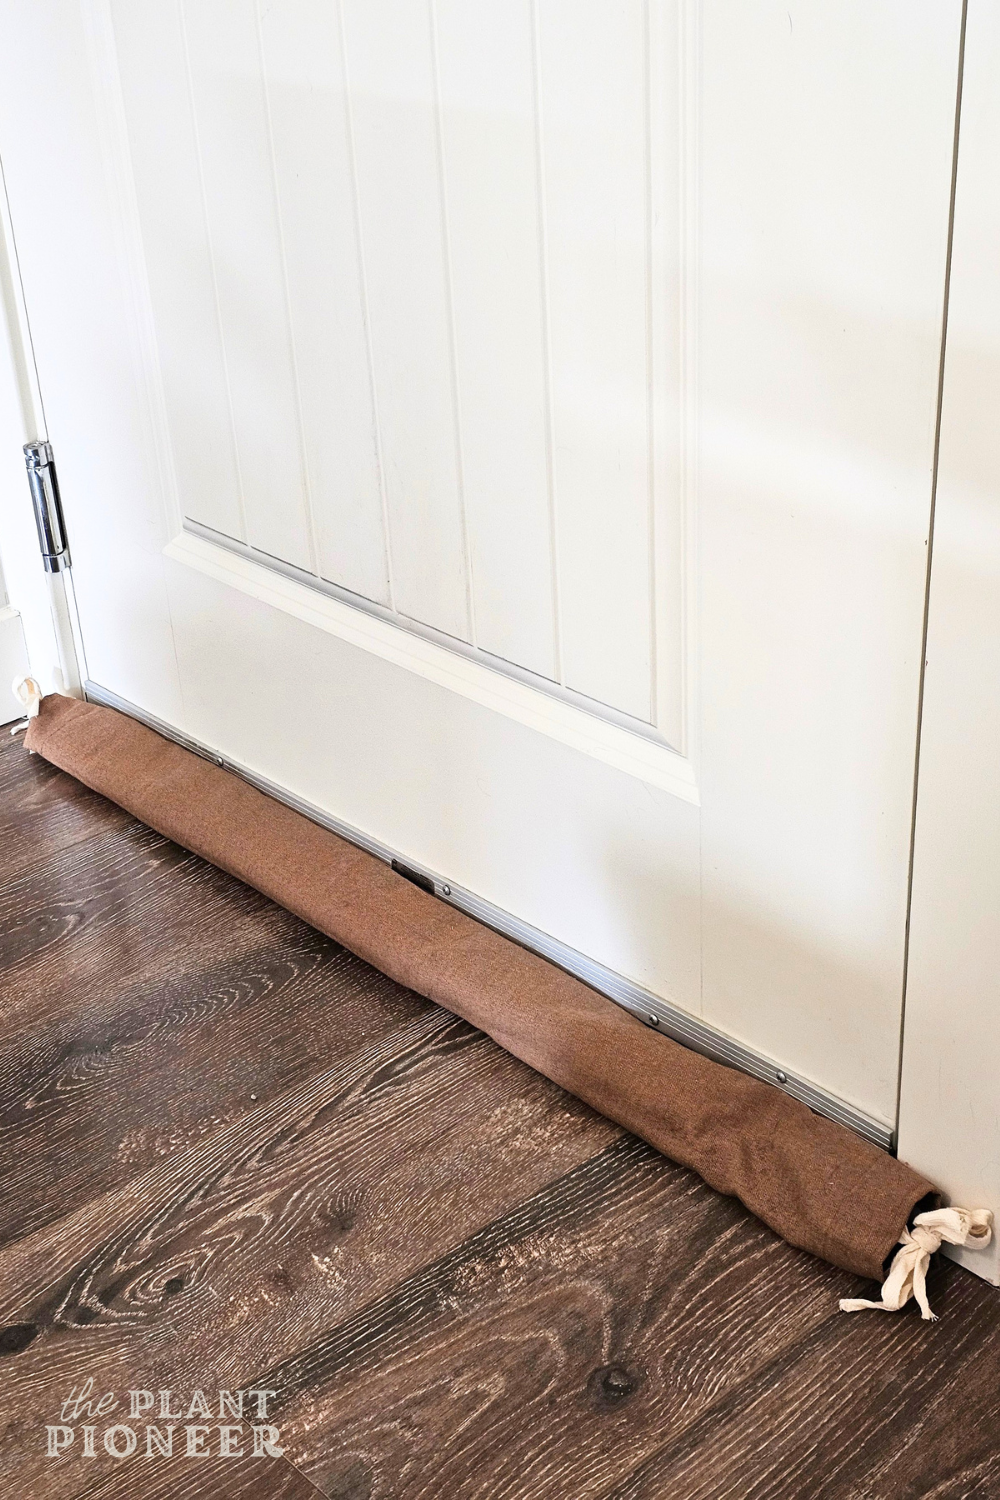
Of course, this draft stopper can also be used for windows and other doors. This is a beginner-friendly sewing project that can be done using supplies you may already have at home. My instructions below are perfect for a 36″ door, but it can easily be customized to any size. Because the pebbles can get heavy, I probably wouldn’t recommend going too much bigger.
Depending on what supplies you already have on hand, such as fabric, it can cost as low at $5 to make.
This page contains some affiliate links, which means I may receive a small commission, at no extra cost to you, if you purchase through these links. I only recommend products that I LOVE and personally use. Read more here.
Before making this, I really wasn’t sure if it would work. My goal was to block odors that are coming in from under our condo’s front door from the hallway. We have a door sweep, but that wasn’t cutting it… there was still a small gap under the sweep. It’s a bit too early to tell if this is working, but it’s looking promising! I will update this post with more information if I feel that it doesn’t work for blocking odors.
Here are the supplies I used to make this:
One pair of old tights/pantyhose
Make sure they are in a good condition without any rips or holes. Try to use ones that are a thicker material rather than a super fragile pair. The pebbles will be going inside the pantyhose, so you don’t want it to tear too easily.
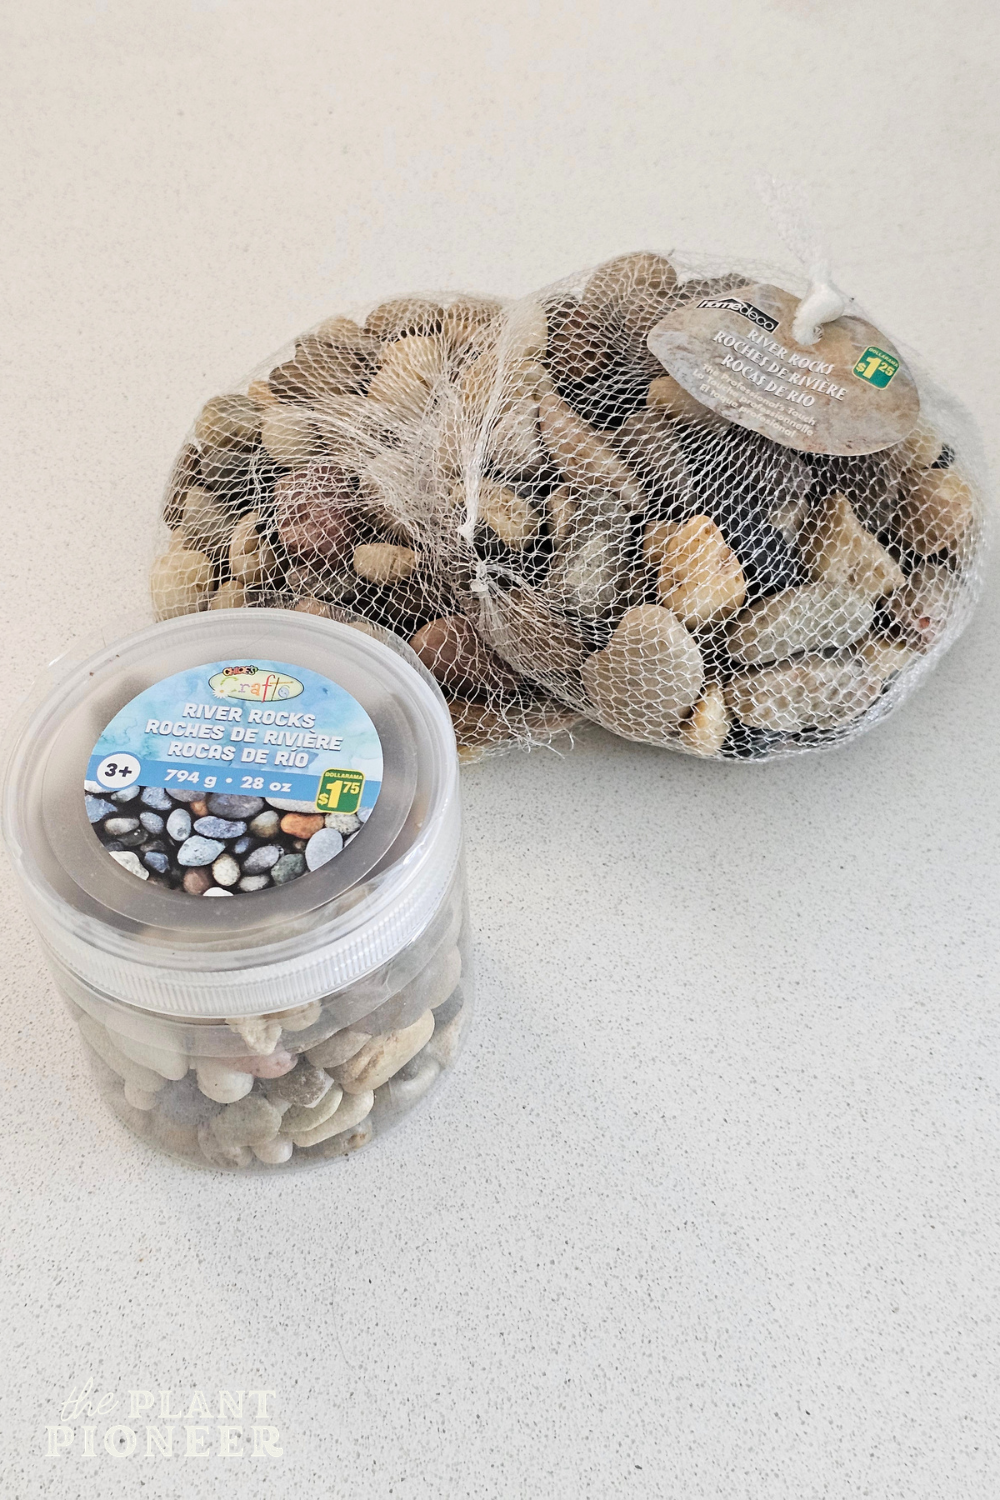
Small round pebbles
The total weight of the pebbles I used was around 4 pounds but I think around 2 pounds of smaller pebbles would work. I chose to use small pebbles in my door draft stopper for a few reasons:
- Food items like dried beans, rice, etc. can attract pests if not sealed fully. I didn’t want to have to worry about making sure the interior part of the door draft stopper was perfectly sealed.
- I already had some pebbles on hand, so this seemed like a good way to use them up. I also knew I could easily buy more from the dollar store! I was determined to do this project at a very minimal cost.
- I wanted to use natural materials- I wasn’t interested in purchasing other types of common filler such as plastic beads (though this type would definitely work for this project if you’d prefer using them.)
I bought 3 packages of polished river rocks from Dollarama. One package was smaller river rocks (recommended size) and two bags were a bit larger (already had these ones on hand), so I didn’t end up using all of the bigger rocks. This works better with smaller rocks, so I recommend getting small ones like these small round river rocks. Another option would be these small sea glass stones.
Scrap fabric and ribbon
You can really use any kind of durable fabric for this. I recommend using a colour that will blend in with your floors or with your door. For a 36″ door, the size of the fabric you’ll need for this should be no less than 41″ long (this gives you an extra 2″ on each end for sewing a neat edge) and 8″ wide (this gives you approximately a 3 – 3.5″ wide door draft stopper- 4″ minus the amount that will be folded over to sew the finished edge.)
The brown fabric I used for this door draft stopper I actually purchased at the thrift store! It was the same roll of fabric that I used for our vintage dining chair seats. I think the whole roll was $8.
To create the ties on the ends that allow the cover to be removable, I simply used some old cotton “ribbon” that I had on hand. This is technically not actual ribbon; I think it’s the fabric wrap that is used to tie around throw blankets that you buy from the store. I don’t really remember where it come from, but it worked great for this project! Any kind of thicker/durable ribbon or string will work.
Step-by-Step Instructions
1. Firstly, measure your door to confirm what size you want the finished door draft stopper to be. Our front door is 36″, so I wanted the door draft stopper to be at least 37″ long to fully cover the bottom. Then, measure your fabric and pair of tights to make sure they are the right size.
A standard pair of women’s tights/pantyhose will work for this; the size of the legs stretch out a bit as you fill them with rocks. Cut off the top of the tights to separate the two leg pieces.
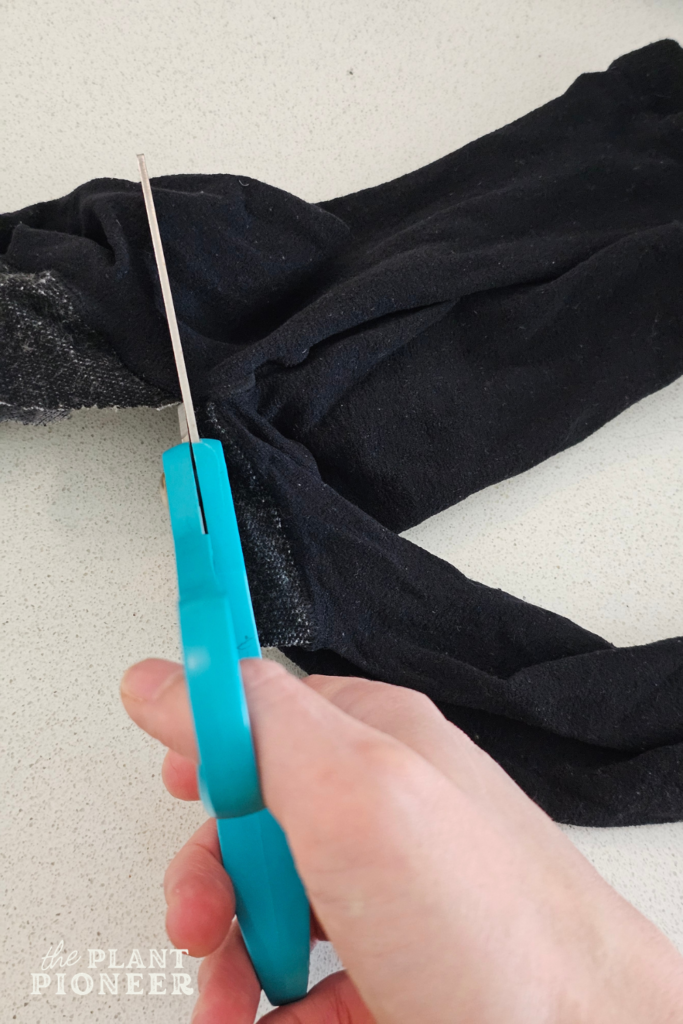 Cut off the top part of the tights
 The two legs of the tights will be used for two separate pieces of “filling” for the door draft stopper
2. Start filling one of the pantyhose legs with pebbles. Before doing this, I poured them into a bowl and picked out any rocks that were especially jagged/sharp or were overly large. You will use approximately half of the pebbles for each leg, although I had some pebbles leftover because I was using larger pebbles (I recommend using the smaller ones if you can).
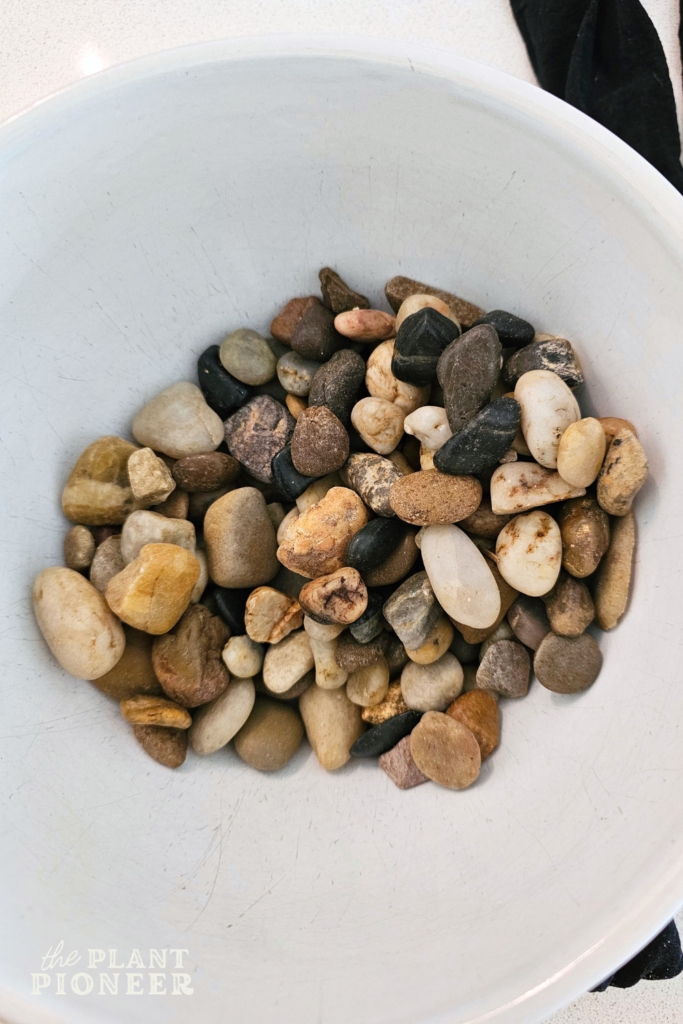 Remove any pebbles that are overly large or have really sharp edges
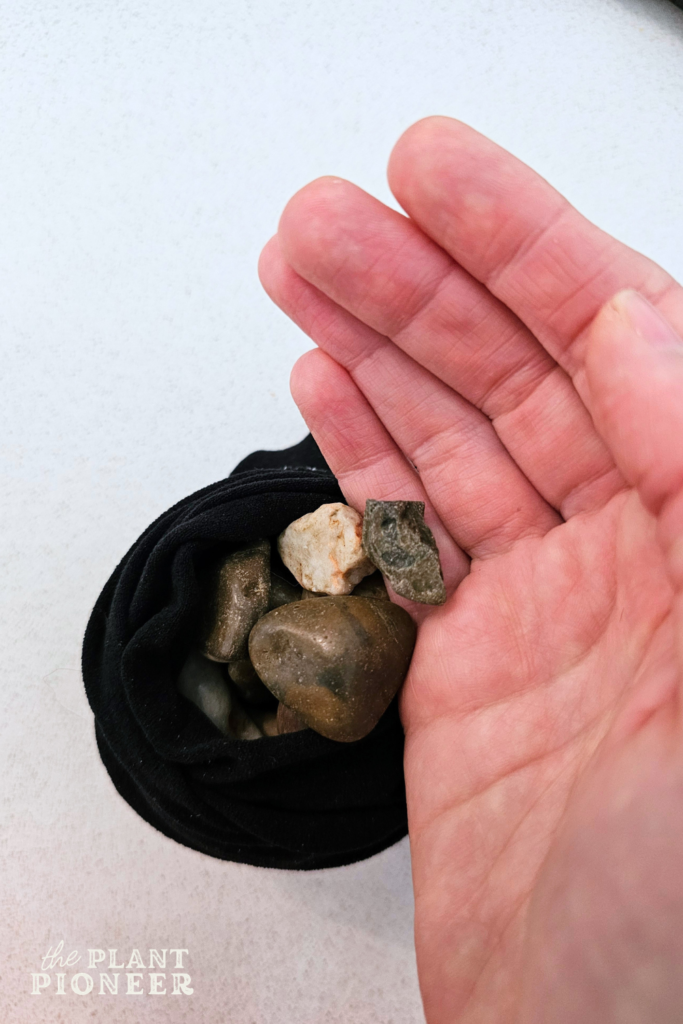 Add approximately half of the pebbles to each leg of the tights
3. After filling each leg, tie a knot at the end. Scrunch your hand along the length of it to even out the rocks.
 Tie a knot at the end of each leg
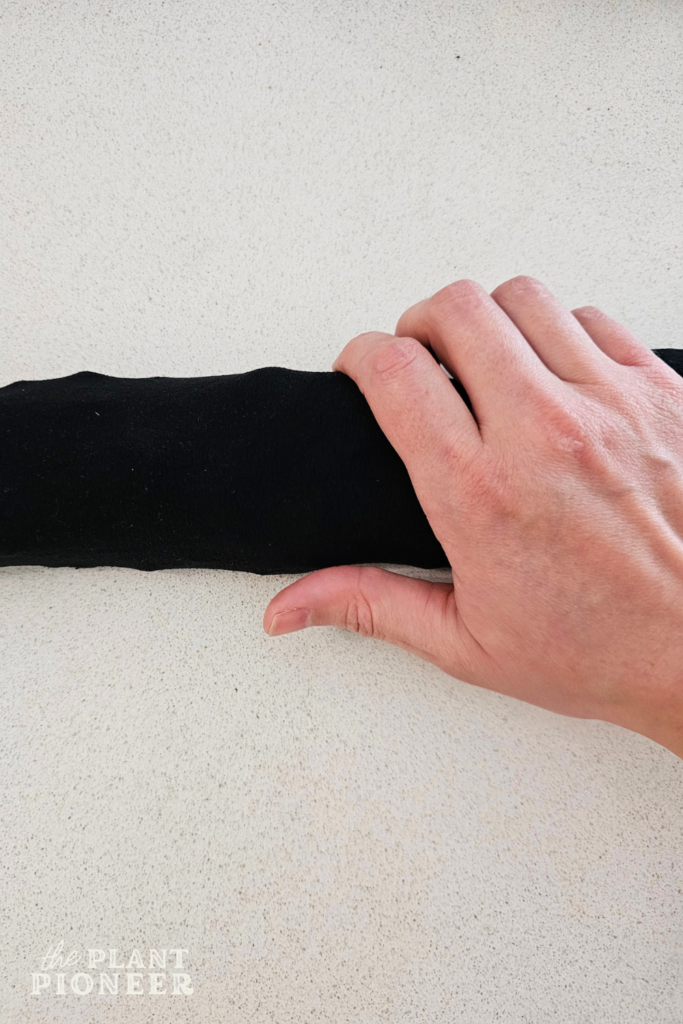 Scrunch your hand along to even out the rocks
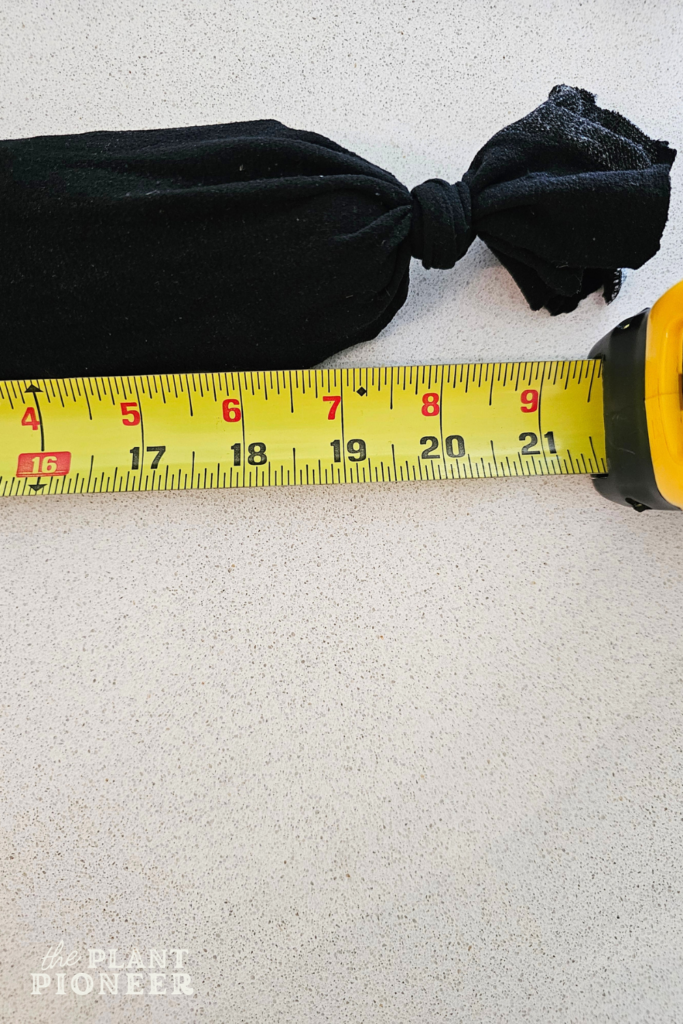
4. Measure each leg to ensure it’s the right length (at least 18.5″, not including the knot, to get a total finished length of at least 37″). If you need it to be longer, you can add more pebbles to stretch it out longer and/or tie the knot closer to the end.
5. The next step will be to sew the cover for the door stopper, so measure your fabric to ensure it’s the right size. You can wrap your fabric around the pebble-filled tights to confirm that it fits before sewing (with enough extra to sew a finished edge). You’ll want the cover to be a little loose to make it easier to put the filling inside, and this also will make it easier to remove the cover when you want to wash it.
 Tie a knot at the end of each leg
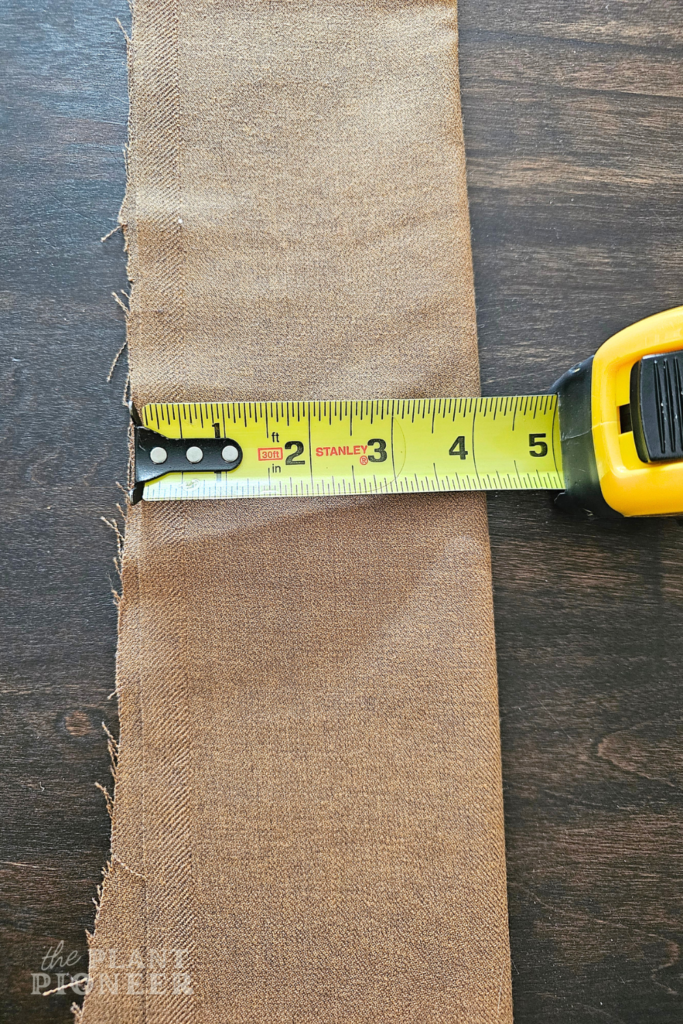 I used an 8″ wide piece of fabric for the cover
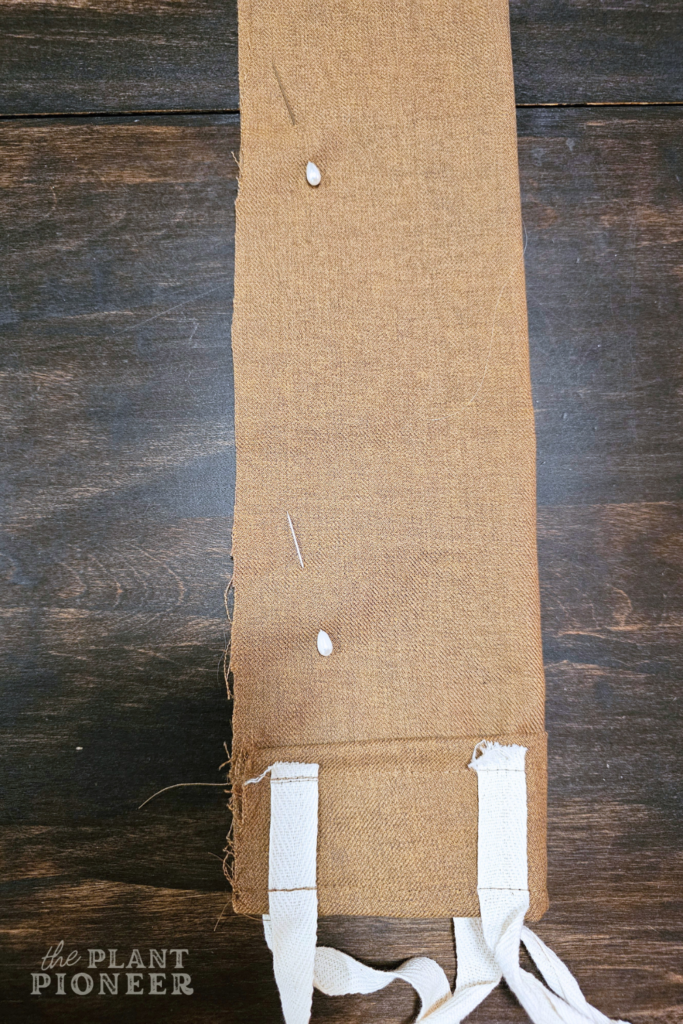
6. Next, sew the ends and attach the ties. On the “wrong” side of the fabric, fold over the edge to create a nice, finished seam and pin in place. The amount of fabric that you fold over will depend on how much “excess” fabric you have. After pinning, ensure that the finished length will still be at your desired size (37″ long).
If you haven’t already, cut your ribbon into 8 pieces in order to create two ties for each end of the draft stopper. If you prefer, you can do just one tie on each side, centered (and then you will need only 4 pieces of “ribbon”). Make sure you have pinned these down on the “wrong” side of the fabric so that the “right” side is on the outside.
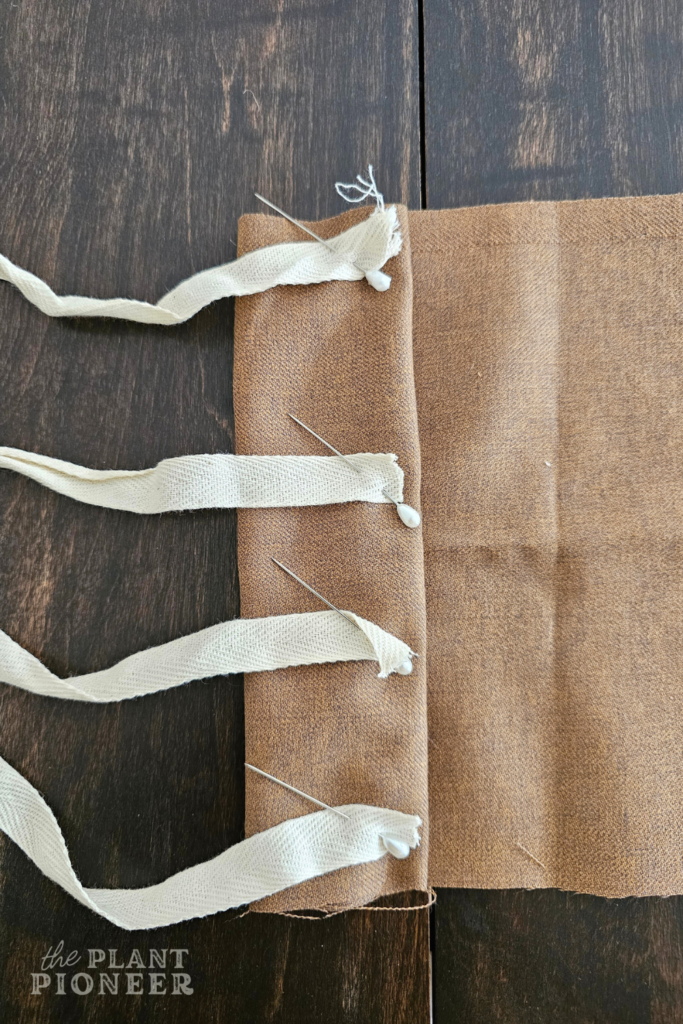 Fold over the end of the fabric so that you can sew a nice, finished edge. Pin your ties/ribbon on top of this.
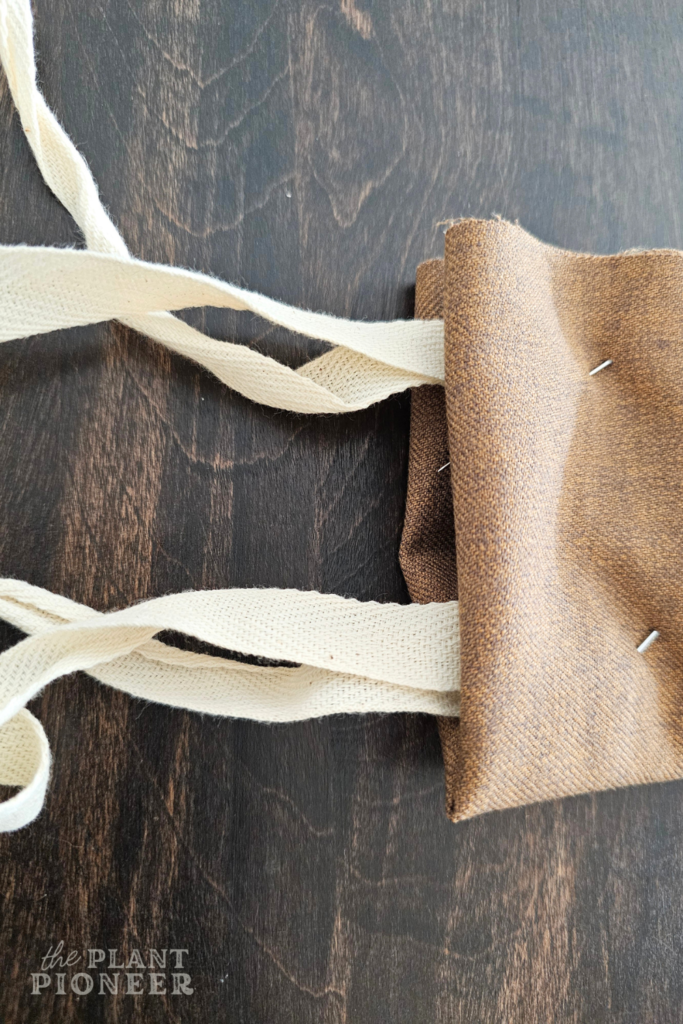 Check that your ties line up properly when the cover is folded over (to tie them in a bow at the end).
Sew these edges and ribbons down together. I chose to sew them down in two spots for extra durability and to keep the edges looking neat.
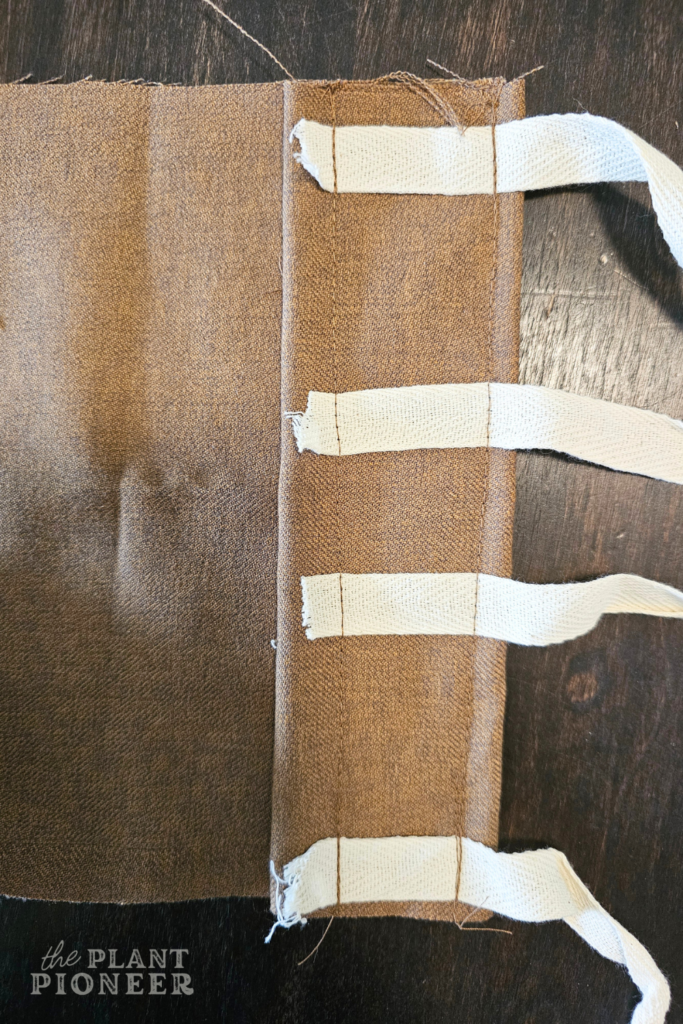 Sew two straight lines to sew the ends and hold down the ribbon ties
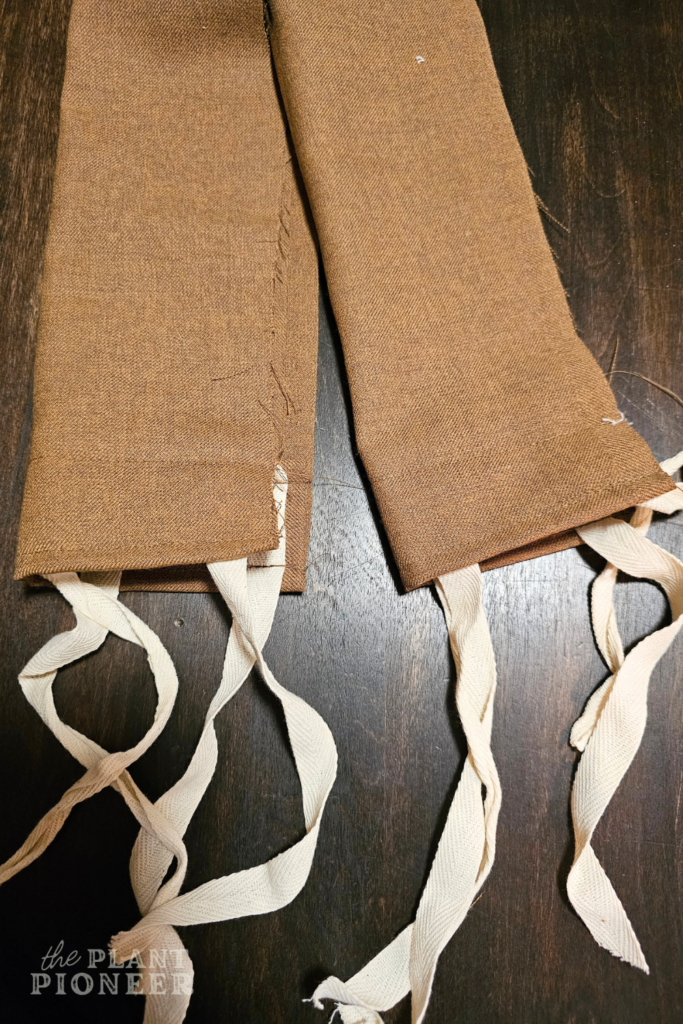 This is how it will look when both ends are sewn with the finished ends
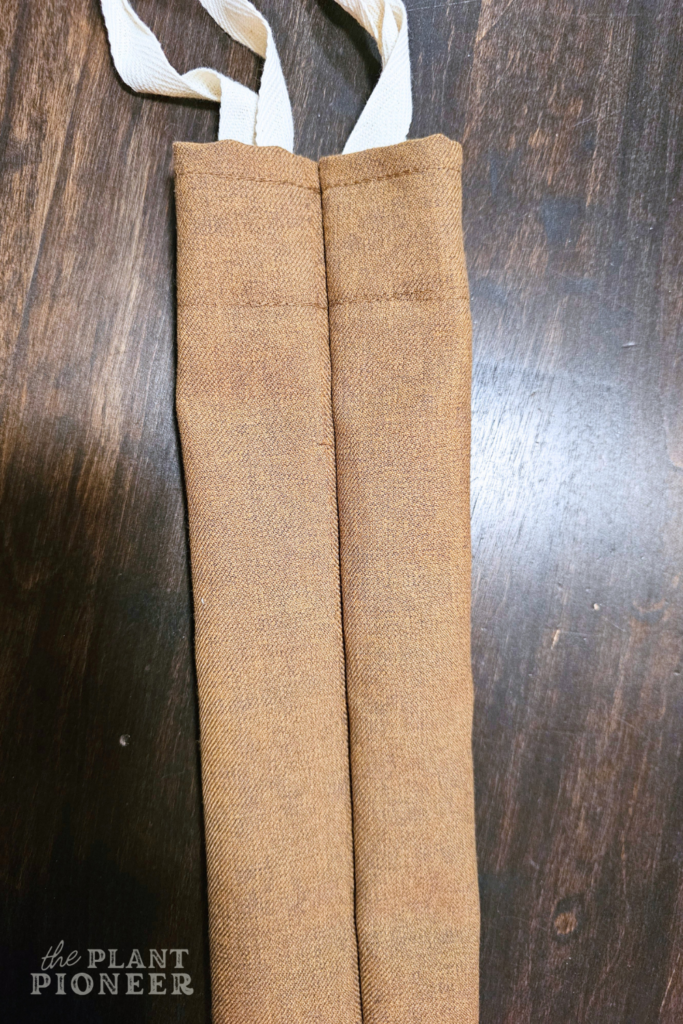
7. Next, all we have to do is sew the long side of the cover. Fold over the cover so that the right sides are together (it will look inside out). Sew a straight line all the way down. After that, turn it back to “right side out” so the right sides will now be facing out!
 Pin the “right” sides together and sew along the long edge
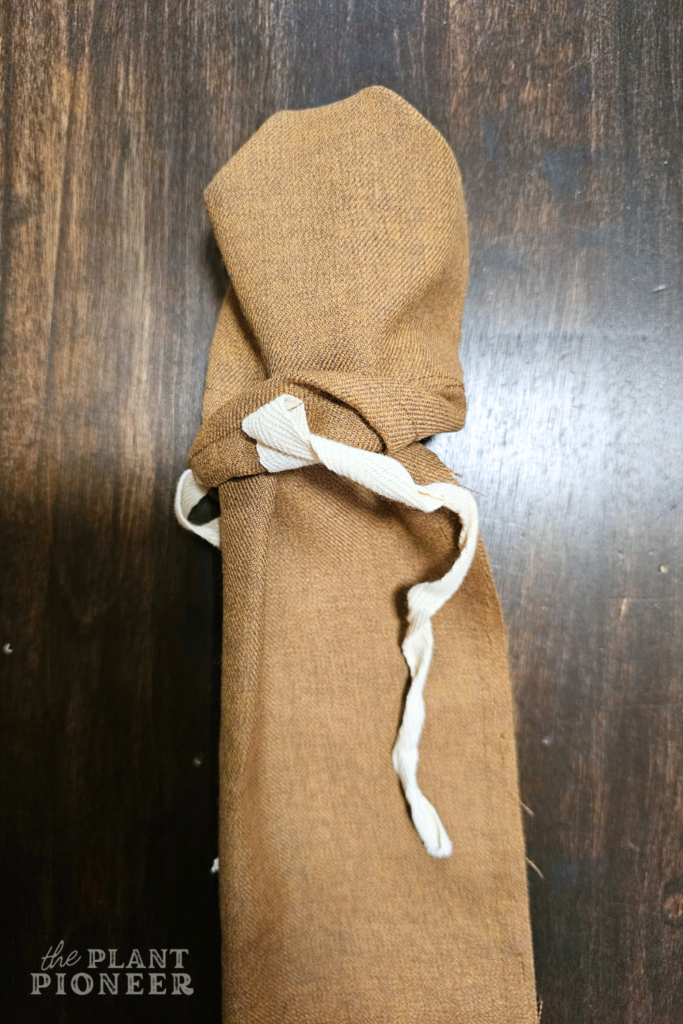 Then turn it “right side out” so the right sides are facing out
8. Place your filling pieces inside the cover. You may need to kind of “wiggle” them in… you can pull up on the bottom almost like when putting a pillow inside a pillowcase. Then tie the ribbons in a bow, and you are done!
 The finished cover
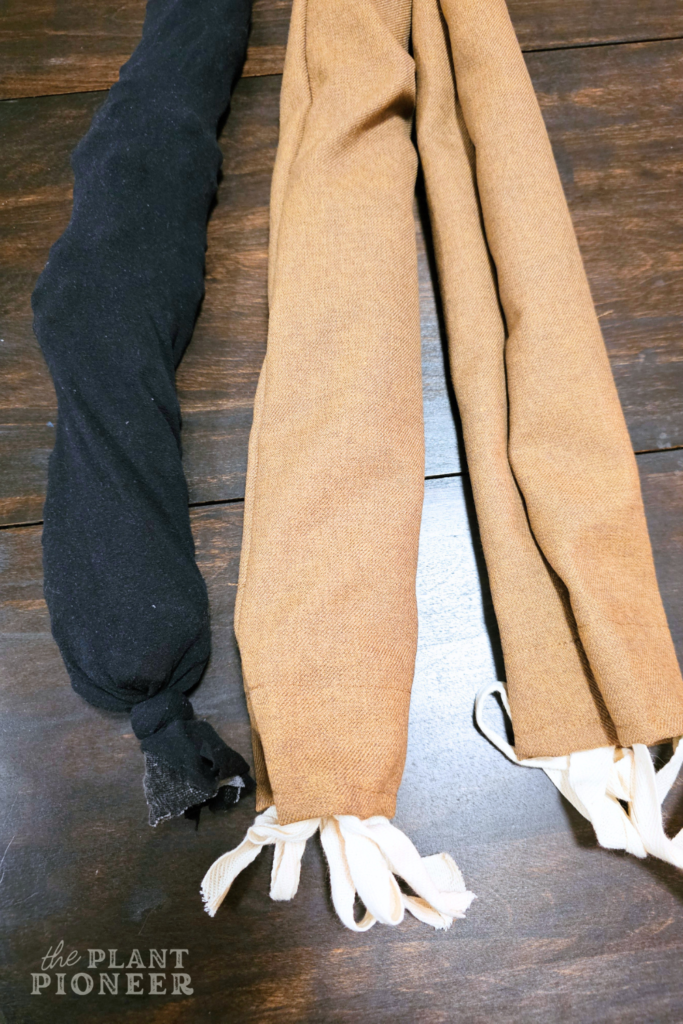 One “filler” piece has been placed inside the cover on one side
You can either tie two bows on each end, or tie them together into one bow. You can also choose to have the bows visible, or tuck them in so they’re not visible. I decided I liked it best with one large bow tied on each end (shown below).
And that’s it! What’s great about this project is that the “filling” is totally customizable… you can change it later if you like! Add more pebbles or remove as you like! I’m actually planning on buying one more bag of small pebbles and seeing how it goes with this being stuffed a little fuller.
Make sure to pin this post to Pinterest to refer back to!


Join the List
Stay informed & receive my latest healthy living tips to your inbox.